
Why Composting Is Worth the Effort
Home composting is one of those habits that pays dividends in multiple directions at once. It removes a meaningful portion of household waste from the trash stream - the US Environmental Protection Agency has estimated that food scraps and yard trimmings together make up a substantial share of what ends up in landfills - while simultaneously producing something genuinely useful for gardens and planters.
The result of composting is called finished compost: a dark, crumbly material that improves soil structure, supports beneficial soil microorganisms, and reduces the need for synthetic fertilizers. Whether you garden seriously or just maintain a few outdoor pots, compost has a practical use.
Composting also fits naturally into the kind of small, sustainable daily habits that make home life feel less wasteful. If you're already working on organizing your kitchen to reduce friction, adding a small countertop scrap container to collect compostable material is a low-effort extension of that same mindset.
What You Can and Cannot Compost
The foundation of composting is understanding the balance between two categories of material:
Greens
Nitrogen-rich compostable materials such as vegetable scraps, coffee grounds, and fresh plant clippings. They fuel microbial activity in the pile.
Browns
Carbon-rich materials like dry leaves, cardboard, and newspaper. They provide structure, absorb excess moisture, and balance the nitrogen from greens.
Aerobic decomposition
The oxygen-dependent breakdown of organic matter by microorganisms. It's faster and less smelly than anaerobic (airless) decomposition.
Vermicompost
Compost produced by worms processing organic scraps. It is exceptionally rich in nutrients and beneficial microbial life.
Finished compost
Fully decomposed organic material that looks dark and crumbly and smells earthy. It is ready to be applied to soil or mixed into planting media.
Top dressing
A thin layer of compost spread on the soil surface around existing plants. It slowly feeds the soil without disturbing plant roots.
- Greens (nitrogen-rich): fruit and vegetable scraps, coffee grounds and paper filters, tea bags (check they're plastic-free), fresh grass clippings, and plant trimmings.
- Browns (carbon-rich): dry leaves, cardboard torn into small pieces, newspaper, paper bags, straw, and wood chips.
A rough guideline is to aim for roughly two to three parts browns for every one part greens by volume. Too many greens without enough browns creates a soggy, smelly pile; too many browns slows decomposition noticeably.
Materials to Keep Out of Your Compost
Avoid adding meat, fish, bones, dairy products, and oily or heavily processed foods to a standard outdoor pile - these attract rodents and other pests and can create persistent odor. Pet waste (dog or cat feces) should also be excluded from home compost used in food gardens, as it can carry pathogens.
Cooked foods without oils or dairy are generally acceptable, but when in doubt, leave them out of a standard outdoor pile until you have some experience managing your system.
Choosing Your Composting Method
There is no single correct way to compost. The right method depends on how much space you have, how much material you generate, and how hands-on you want to be.
Outdoor Bin or Open Pile
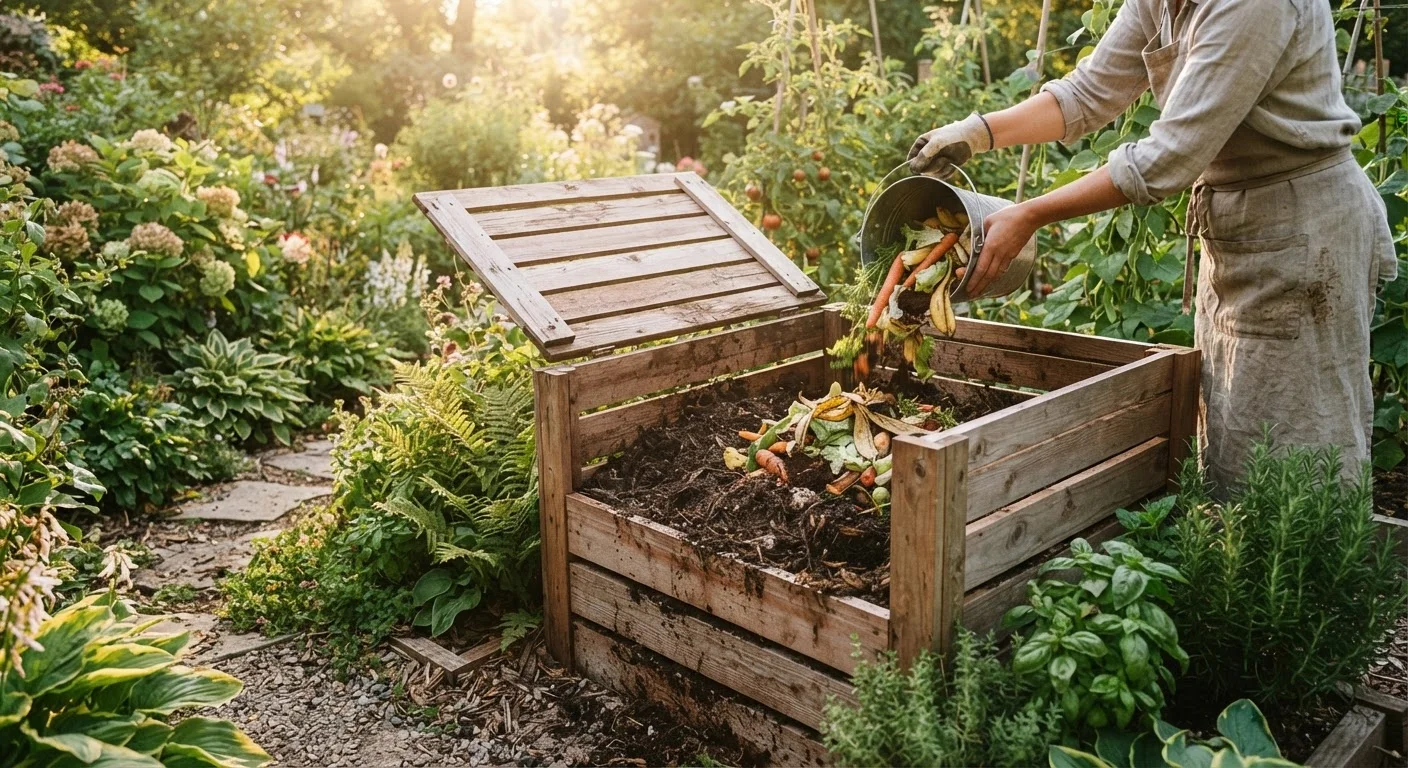
This is the simplest approach for anyone with a small yard. You can use an open pile in a corner of the garden or a purchased or DIY enclosure. Bins help contain the pile, retain moisture, and deter some pests. This method suits moderate-to-large volumes of kitchen and yard waste.
Compost Tumbler
A sealed, rotating drum speeds decomposition and makes turning easy. Tumblers are particularly useful if local wildlife (raccoons, rodents) is a concern, since they're fully enclosed. The trade-off is limited capacity and a higher upfront cost.
Vermicomposting (Worm Bin)
Red wiggler worms process food scraps into vermicompost, which is exceptionally nutrient-dense. A worm bin is compact enough to keep indoors, making it the go-to option for apartment dwellers or anyone without outdoor space. It requires a bit more attention to moisture and temperature but is very manageable once established.
Start With the Simplest Option
If you're unsure which method to choose, start with a basic outdoor bin or open pile rather than waiting until you have the perfect setup. Most beginners learn more from doing than from planning. You can always add a tumbler or worm bin later once you understand your household's output and habits.
Setting Up and Maintaining Your Pile
Once you've chosen a method, setup is straightforward. Place an outdoor bin or pile in a partially shaded spot with decent drainage - full sun dries the pile out too quickly, and a waterlogged location creates anaerobic (airless) conditions that slow things down and cause odor.
Start with a layer of browns at the base, then alternate layers of greens and browns as material becomes available. You don't need to add everything in precise layers every time; just keep the ratio roughly balanced over time. Chop or shred materials into smaller pieces when possible - this dramatically increases the surface area available to microorganisms and speeds decomposition.
Two maintenance tasks matter most:
- Moisture: The pile should feel roughly as damp as a wrung-out sponge. In dry weather, add a little water. In wet weather, cover the pile or add extra browns.
- Aeration: Turn the pile with a garden fork every one to two weeks if you want faster results. Turning introduces oxygen, which feeds the aerobic microbes doing most of the work.
This kind of steady, manageable routine fits well alongside other everyday habits that support a well-run home.
Cold Weather Slows Things Down
Microbial activity drops significantly when temperatures fall below about 50°F. In colder climates, your pile may appear dormant in winter - that's normal. You can keep adding materials through winter and the pile will resume active decomposition when temperatures rise in spring. Insulating the pile with extra browns or a cover can help retain some heat.
When Your Compost Is Ready to Use
Finished compost is dark brown, crumbly, and smells like earth - not like rotting food. Most of the original materials should no longer be identifiable. Depending on how actively you manage the pile and the ambient temperature, this takes roughly two to six months.
If you find partially broken-down material when you're ready to use the compost, simply screen it through a wire mesh or old hardware cloth. The unfinished chunks go back into the active pile to continue breaking down.
Compost is most commonly used by:
- Mixing it into garden bed soil before planting
- Spreading a thin layer (called a top dressing) around established plants
- Blending it with potting mix for containers and raised beds
Even a modest amount of finished compost improves soil structure over time - there's no need to produce large volumes to see benefits. Getting into the rhythm of composting is a small, durable change to home life that, like a measured approach to decluttering, tends to feel more rewarding the more consistently it's practiced.